Table of Contents
- How To Clean Foggy Headlights
- 1. Reasons Why Headlights Become Foggy
- 2. Diagnosing Foggy Headlight Conditions
- 3. Assessing The Extent Of Headlight Fog
- 4. Selecting The Best Cleaning Solution
- 5. Preparing The Headlights For Cleaning
- 6. Applying The Cleaning Solution
- 7. Cleaning The Headlights
- 8. Applying Protective Sealant
- 9. Regular Maintenance
- 10. Troubleshooting Issues
- Frequently Asked Questions about Foggy Headlights
- Are There Any Alternatives To Using A Cleaning Solution For Foggy Headlights?
- Conclusion to cleaning your headlights at home
Home » Cleaning your foggy headlights – OUR DIY
How To Clean Foggy Headlights
Foggy headlights can be a real eyesore on your car, making it difficult to see the road clearly at night. Cleaning foggy headlights is important to keeping your car looking good and running safely. But how do you clean foggy headlights? This article will cover the steps you need to take to get your car’s headlights back to their sparkling best.
If you’ve ever noticed that your car’s headlight lenses are becoming hazy or yellowed, then you know just how unsightly it can look. Not only does this reduce the value of your vehicle, but it also makes it much harder to see when driving at night. Fortunately, there are some easy steps that anyone can take to restore their foggy headlights and get them looking like new again.
From using special cleaning solutions to using a buffing compound, this article will explain exactly what you need to do in order to clean your foggy headlights and keep them shining brightly for many miles ahead. So if you’re ready to tackle this task, keep reading and discover the simple steps necessary for getting those bright headlights back!
1. Reasons Why Headlights Become Foggy
Headlights become foggy for several reasons, but the most common cause is exposure to direct sunlight. The sun’s ultraviolet rays can break down the sealant used to protect the headlight’s lens, leading to fogging and discoloration. Another factor is moisture getting inside the headlight housing. This can happen when driving in wet weather or if you don’t properly dry your headlights after washing them.
When headlights become foggy, it affects their performance by reducing visibility at night and making it difficult to see other drivers on the road. Foggy headlights are also unsightly, which can impact the overall appearance of your car. To maximize safety and keep your car looking good, it’s important to clean foggy headlights as soon as possible.
Fortunately, there are several methods you can use to restore clarity to foggy headlights – from using a DIY solution like baking soda and vinegar to buying a specialized headlight restoration kit. Whatever method you choose, follow all instructions carefully and wear protective gear such as gloves and glasses while cleaning your headlights. Taking these steps will help ensure that your lights are restored quickly and safely so you can drive confidently again at night.
2. Diagnosing Foggy Headlight Conditions
To diagnose foggy headlight conditions, you should first assess the condition of your vehicle’s headlights. Check for any cracks, chips, discoloration, or signs of water damage. If you see any of these issues present, it could signify that your headlights are foggy due to moisture getting inside them. Also, check if the lens is covered in dirt and dust. This can cause a hazy appearance and reduce visibility while driving at night.
Once you have identified any potential causes of foggy headlights, you’ll need to take further measures to determine if they are indeed fogged up. It’s important to note that some vehicle models may require special tools and techniques for diagnosing headlight issues. For instance, some cars will require a specialized light meter to measure the amount of light emitted from the headlight lens. This can help determine if the headlight has become cloudy due to wear and tear or if it has been caused by external factors such as condensation or dirt accumulation.
If you find that your headlights are indeed foggy due to wear and tear or external factors, then there are several solutions available to help improve their visibility and performance. These include replacing the lens with a new one or using specialized cleaning products designed specifically for headlights. Whichever option you choose, ensure that you follow all instructions carefully so that you don’t cause any further damage to your car’s lighting system.
3. Assessing The Extent Of Headlight Fog
Assessing the extent of headlight fog is an important step in cleaning foggy headlights. To do this, you must inspect the headlights and determine how far the corrosion has spread. This will allow you to decide which cleaning method is most appropriate for your car.
When inspecting your headlight, look for signs of corrosion, such as yellowing, cloudy patches or discoloration. If you find any of these symptoms, you should continue testing the severity of the fogging. You can do this by running a finger along the surface of the headlight lens and seeing if it feels rough or corroded. If it does, you may need to use a stronger cleaning method than recommended for milder cases.
It’s also important to check if the headlight lenses have cracks or holes in them before attempting any cleaning. If any cracks or holes are present, then using a chemical cleaner may not be possible and you’ll have to replace the headlight altogether. Take your time when assessing the condition of your headlights and make sure that you don’t miss anything that could potentially cause more damage during the cleaning process.
Once you’ve determined how bad the fogging is and whether or not any cracks or holes are present, then you’re ready to begin cleaning your foggy headlights!
4. Selecting The Best Cleaning Solution
Once you’ve assessed the extent of your foggy headlights, it’s time to select the best cleaning solution. There are a few different methods for removing fog, so it’s important to do some research to find out which one is right for your vehicle.
If you don’t want to invest in a specialized headlight cleaner, some DIY solutions could work just as well. For example, many people have successfully used toothpaste or baking soda mixed with water on their headlights. Both options are easy to come by and won’t cost you much money. However, they may require more elbow grease than a professional headlight cleaner.
Cleaning headlight options compared
Another option is to buy headlight restoration kits that can be found at most auto parts stores. These kits usually include sandpaper and polishing compounds that will help restore the clarity of your headlights over time. The downside is that this process can take several hours and may require multiple attempts in order to get your headlights looking new again.
No matter which method you choose, make sure to read the instructions carefully and wear protective gloves while cleaning your headlights. This will help ensure that you don’t damage them in any way during the process and achieve optimal results quickly and safely.
5. Preparing The Headlights For Cleaning
Now that you’ve chosen the best cleaning solution for your foggy headlights, it’s time to get them ready for some elbow grease. The preparation process is usually straightforward and involves simple steps.
First, use a dry cloth or towel to remove any dirt and debris from the headlight. Make sure to be gentle as you don’t want to scratch the surface of the headlights. You may need to use a soft brush if there are any areas with heavy debris.
Once all of the dirt has been removed, it’s time to apply your cleaning solution. Use a clean cloth and gently rub in circular motions until all the fog has cleared away. Depending on how bad the fog was, you may need more than one cleaner application before it’s completely gone. Be sure not to scrub too hard as this can damage the headlight material.
When you’re done cleaning, rinse off your headlights with cool water and then dry them with a cloth or towel. After that, you can enjoy your restored headlight clarity!
6. Applying The Cleaning Solution
Now that the headlights are ready, it’s time to start cleaning them. First, make sure you have all the materials you need. You’ll need a cleaning solution, a soft cloth, and some protector or sealant. Once you’ve gathered these items, it’s time to begin applying the cleaning solution.
When applying the cleaner to the headlight, start at the bottom and work your way up. Make sure you’re using gentle circular motions as you apply it. You don’t want to scratch or damage the surface of your headlight by scrubbing too hard. After you’ve applied the cleaner, let it sit for about five minutes to allow it to penetrate and dissolve any residue or dirt buildup on your lens.

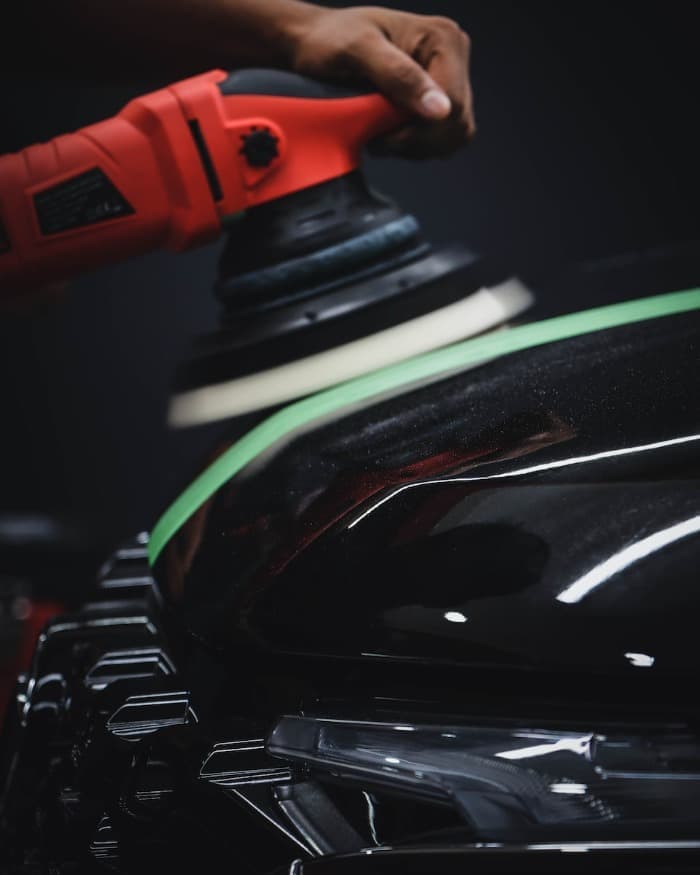
with our DIY guide you can get clear headlights just like this
After five minutes have passed, take a damp cloth and wipe off any remaining cleaner from your headlights. If there is still dirt present in certain spots, repeat the process until all of it has been removed from your headlights. When finished wiping away any leftover cleaner and dirt residue, use a sealant or protector spray to help keep your headlights clean for longer periods. This step will also help restore clarity and shine back into your foggy headlights.
7. Cleaning The Headlights
As you move on to the final step of cleaning your foggy headlights, it’s time to clean the headlights themselves. The cleaning solution will have loosened the dirt and grime on the headlights’ surface, making it easier for you to remove them thoroughly.
To begin, take a soft cloth and wet it with water. Rinse off any remaining residue from the headlights, allowing all dirt and debris to be removed. Once that’s done, use a dry cloth to wipe away any additional moisture from the surface of your headlights. This will help prevent water spots from forming after they are cleaned.
Next, use a microfiber cloth and another cleaning product designed specifically for car headlights to remove any stubborn dirt or grime that the cleaning solution may have left behind. Gently rub away at these areas until they are spotless. Make sure not to apply too much pressure when doing this, as excessive scrubbing can damage the surface of your headlight lenses and cause scratches or other imperfections.
Once all dirt and grime have been successfully removed from your headlights, use a glass cleaner or polishing compound to restore their shine and clarity. Apply a small amount of product onto a soft cloth and buff it in small circles until your headlights look new!
8. Applying Protective Sealant
Now that the headlights are clean, it’s time to apply a protective sealant. This will help keep them looking good and help protect them against dirt and grime build-up in the future. You’ll need a sealant specifically designed for car lights to do this. Begin by cleaning off any excess dirt or grime from the headlights. Once that’s done, apply a thin sealant layer to the headlight surface with a cloth or brush. Make sure to get all around the edges of each headlight as well.
Once the sealant is applied, let it sit for 30 minutes before wiping off any excess product with a dry cloth. It’s also important to use light pressure when buffing the headlights to prevent further damage. This step is key in helping preserve your headlights since it keeps dirt and debris from sticking to them more easily.
When finished, you should have clean foggy headlights that look new! Don’t forget to check your lights regularly for any signs of wear or damage and reapply sealant as needed to keep your headlights looking their best. These steps will ensure that your foggy headlights stay clean and clear for many years!
9. Regular Maintenance
Regular maintenance is key to keeping foggy headlights clean. This means doing a thorough job each time the headlights are cleaned and making sure that the protective sealant is applied afterward. Regular maintenance should be done every few months or so, depending on the climate and how often the car is driven in inclement weather. It also helps to know what kind of cleaning products to use for headlight restoration, as some can do more harm than good.

First, starting with a good quality cleaner specifically formulated for headlight restoration is important. These cleaners come in liquid and aerosol form, but whichever you choose, make sure they won’t damage any plastic components on your car. Once you’ve selected a cleaner, spray it onto the headlights and let it sit for about 10 minutes or so before wiping it off with a microfiber cloth. If residue remains left after cleaning, you can use an old toothbrush or a small brush to scrub away any stubborn dirt or debris.
After cleaning your headlights, it’s essential to apply a protective sealant to help keep them from fogging up again. Sealants usually come in the form of waxes or sprays, which are designed specifically for auto parts like headlights and taillights. Apply the sealant according to package instructions and allow it to dry thoroughly before driving your car again. That way you can ensure that your headlights remain clear and bright for years to come!
10. Troubleshooting Issues
Troubleshooting issues with foggy headlights can be a tricky process. If regular maintenance isn’t enough, there are a few additional steps that you can take to get your headlights shining bright again. First, it’s important to check the seal around the headlights for any cracks or signs of damage. If the seal is damaged, it could be allowing moisture to get inside of the headlight and cause them to become foggy. It’s also worth checking if any cracks in the lens itself may need to be filled to prevent further moisture from entering.
If these steps don’t seem to fix the problem, you may want to try using a headlight restoration kit on your headlights. These kits typically contain products like polishes and waxes that can help restore clarity to foggy headlights and make them appear new. It’s also important to clean off any dirt or debris that may have built up on your headlight lenses in order to ensure they are free of contaminants which could further reduce their visibility.
Finally, if all else fails and you’re still having trouble with foggy headlights, it might be time for a professional repair or replacement job. A certified mechanic or automotive technician will be able to determine exactly what is causing your headlights to become foggy and advise you on the best course of action going forward. Don’t let foggy headlights keep you from seeing clearly at night – address the issue as soon as possible so that you can enjoy clear visibility when driving after dark!
Frequently Asked Questions about Foggy Headlights
What Is The Most Cost-Effective Way To Clean Foggy Headlights?
When cleaning foggy headlights, there’s no denying that it can be a tricky task. Not only is it time-consuming, but if you don’t have the right materials, you may damage your vehicle. That’s why many people are asking the same question: what is the most cost-effective way to clean foggy headlights?
There are several different methods for cleaning foggy headlights, all of which have pros and cons. For instance, you could buy a headlight restoration kit from an auto parts store, which typically includes sandpaper, a polishing compound, and applicators. This method will give you the best results, but it can also be quite expensive. Alternatively, you could use household items like baking soda, vinegar, or toothpaste to give your headlights a good scrubbing. Of course, these DIY solutions won’t get the job done as thoroughly as a professional kit might.
No matter which approach you take, remember to wear protective eyewear and gloves when working on your car’s headlights. You’ll also want to check with your local car dealership or mechanic for advice on safely cleaning your vehicle’s lights without causing unnecessary damage. Taking these precautions will help ensure that your headlights stay looking good for years to come!
What Are The Long-Term Effects Of Cleaning Foggy Headlights?
Cleaning foggy headlights can be an effective and inexpensive way to improve visibility and safety while driving, however, it is important to consider the potential long-term effects. Depending on the method used, a variety of consequences should be taken into account.
When cleaning foggy headlights, one might use a chemical cleaner or a DIY method like toothpaste or baking soda. Unfortunately, these solutions can actually damage the plastic covering of your headlight lenses over time. This is because many of these substances are too abrasive for the delicate materials used in car parts. As such, these cleaners may cause the protective coating on your lenses to break down and become discolored or cloudy from loss of clarity. In addition, they may even cause tiny scratches in the lens, eventually leading to more fogging and reduced visibility. Additionally, some of these solutions are highly corrosive and could potentially damage other components in your car as well.
On the other hand, investing in professional headlight restoration services may provide a longer-lasting solution with fewer risks. These services often involve sanding away any oxidation buildup and then applying a special sealant to protect against further damage. This process can greatly improve visibility while maintaining the structural integrity of your headlights for much longer than DIY methods or chemical cleaners. Furthermore, it is much less likely to cause any additional damage or corrosion due to its gentler approach that does not rely on abrasives or corrosive chemicals.
Are There Any Special Tools Needed To Clean Foggy Headlights?
Cleaning foggy headlights is necessary for anyone who wants their car to look its best. But, it’s important to understand the tools and methods required to do the job right. Are there any special tools needed to clean foggy headlights?
The short answer is no. All that’s necessary are some basic supplies you probably already have around your home – including a soft cloth, water, and general-purpose cleaner. Of course, if you don’t have those items handy, you can purchase special cleaning kits from most auto parts stores.
Once you’ve gathered the necessary supplies, cleaning foggy headlights is relatively simple: First, spray the lens with water and wipe off any dirt or grime with a soft cloth. Then, apply some general-purpose cleaner on the lens and use a circular motion to rub it in. Finally, rinse off the cleaner with water and dry it with a clean cloth.
It’s also worth noting that regular cleaning of your headlights will help them last longer – so make sure to give them a good scrub every few months! With these tips in mind, you should be able to keep your headlights looking like new for years to come.
Is It Safe To Drive With Foggy Headlights?
Driving with foggy headlights is a risky proposition. The reduced visibility caused by the foggy lenses can make it difficult to see in front of you, which can be dangerous if you are driving at night or in bad weather. It’s important to consider the safety of yourself and other drivers when driving with foggy headlights.
Fortunately, there are some ways you can reduce the risk associated with driving while your headlights are foggy. First, clean your headlights regularly and use a product specifically designed for cleaning them. This will help keep them clear and free of debris that could further reduce visibility. Finally, you’ll want to ensure your headlights are properly aligned to provide maximum light output. Finally, drive more slowly when your headlights are foggy, and be extra careful in low-visibility conditions such as rain or snowstorms.
When it comes down to it, taking care of your car – including regularly cleaning your headlights – will always be the safest option for you and other drivers on the road. If possible, avoid driving with foggy headlights entirely and take steps to prevent them from getting too cloudy in the first place. A few minutes of preventive maintenance now can save time and money later on – not to mention possibly keeping you safe on the road!
Are There Any Alternatives To Using A Cleaning Solution For Foggy Headlights?
When it comes to foggy headlights, many people think that the only way to fix them is with a cleaning solution. However, there are alternatives to using this type of product. Let’s explore what these options are and how they can be used.
One popular alternative is toothpaste. Toothpaste has abrasive qualities that can work to remove the fog from the headlights without doing any damage to the plastic surface. All you need to do is apply some toothpaste on a damp cloth and work it into the headlight in circular motions until the fog dissipates. This method may take a bit longer than commercial products, but it can still get the job done.
Another option for cleaning foggy headlights is using baking soda and vinegar. This combination creates an effective paste that can be applied directly onto the headlight and scrubbed with a damp cloth or brush until the fog lifts away. This method might take more time and effort than using toothpaste, but it often produces better results because of its stronger cleaning power.
No matter which method you choose, make sure to wear protective gloves while working on your headlights so you don’t accidentally damage them further with any sharp objects you’re using or any harsh chemicals that might be present in either your toothpaste or cleaning solution. Additionally, ensure you protect your eyes by wearing safety goggles if you’re applying anything directly onto your car’s headlights. These simple precautions will ensure that your car remains safe and clean for years to come!
Conclusion to cleaning your headlights at home
In conclusion, cleaning foggy headlights is an important part of car maintenance. It can be done cost-effectively and doesn’t require any special tools. With the right solution and a little elbow grease, your headlights shine like new again.
The long-term effects of cleaning foggy headlights are lasting, so it’s important to take the time to do it right. Driving with foggy headlights is unsafe, so it’s essential to ensure they are clear and clean before hitting the road.
Finally, there are alternatives to using a cleaning solution for foggy headlights such as sandpaper or toothpaste. Whichever method you choose, remember that taking the time to clean your headlights will keep you safe and save you money in the long run.