Table of Contents
- How To Clean Headlights With Wd40
- 1. Safety Considerations
- 2. Gather Necessary Tools And Materials
- 3. Preparing The Headlights
- 4. Applying The Wd-40
- 5. Wiping Off The Excess
- 6. Polishing The Headlights
- 7. Cleaning Hard-To-Reach Areas
- 8. Adding A Sealant
- 9. Troubleshooting Common Issues
- 10. Regular Maintenance
- Frequently Asked Questions about wd 40 and your headlights
Home » Cleaning your car headlights with WD 40
How To Clean Headlights With Wd40
Have you ever noticed that your car’s headlights aren’t as bright as they used to be? Over time, headlights can become foggy and yellowed, which reduces their visibility. But don’t worry – there’s a simple and affordable solution! Cleaning your foggy headlights with WD-40 is an easy way to restore the clarity of your vehicle’s lights. In this article, we’ll show you how to clean your headlights with WD-40 in just a few steps.
If you’re tired of driving around with dull and hazy headlights, look no further than WD-40 for help. Whether you’ve got an older car or a newer model, using WD-40 to clean your car’s headlights is a great way to ensure that you have clear lights for safer driving. Not only does cleaning with WD-40 make your car look better, but it also helps improve visibility at night – and who doesn’t want that?
By the end of this article, you’ll know exactly how to clean your headlights with WD-40 so that they shine like new! You won’t believe how simple it is – it takes a few minutes and some basic supplies. So let’s get started!
1. Safety Considerations
When cleaning your headlights, safety should be your top priority. You’ll want to ensure you wear protective clothing, such as gloves, glasses, or goggles. Additionally, it’s important to ensure that you’re working in a well-ventilated area since WD40 is a petroleum-based product, and its fumes may be hazardous.
Before using WD40 on your headlights, you should understand what kind of headlights you have. Some headlight lenses are made of plastic, while others are made of glass. If you’re unsure what type of material your lens is made from, check the owner’s manual for your vehicle. Depending on the material of the headlight lens, WD40 may or may not be an appropriate cleaner to use.
If you decide that WD40 is safe on your headlights, it’s best to start by applying a small amount of the product directly onto a soft cloth or paper towel and then gently wiping away any dirt or debris from the lens surface. You will want to avoid scrubbing too hard so as not to scratch the surface of the lens or damage the paint around it. Once all the dirt has been removed, take another clean cloth and wipe off any excess WD40 residue from the headlight lens before waxing and polishing for extra protection against future grime buildup.
2. Gather Necessary Tools And Materials
Before attempting to clean headlights with WD40, it’s important to make sure you have the necessary tools and materials. You’ll need a can of WD40, some paper towels or a microfiber cloth, and a pair of protective gloves. To ensure a successful outcome, choosing a warm and sunny day is best so the WD40 won’t dry too quickly when applied.
To begin cleaning, spray the WD40 onto your headlights and allow it to sit for about five minutes before wiping off any dirt or debris with a paper towel or cloth. Make sure you don’t use too much pressure during this step, as this could damage your headlight lenses. If any stubborn areas require extra attention, you may need to repeat these steps more than once. Additionally, suppose you find that your headlights aren’t as clear as you would like after using the WD40. In that case, you may consider investing in additional cleaning solutions such as window cleaner or car wax.
3. Preparing The Headlights
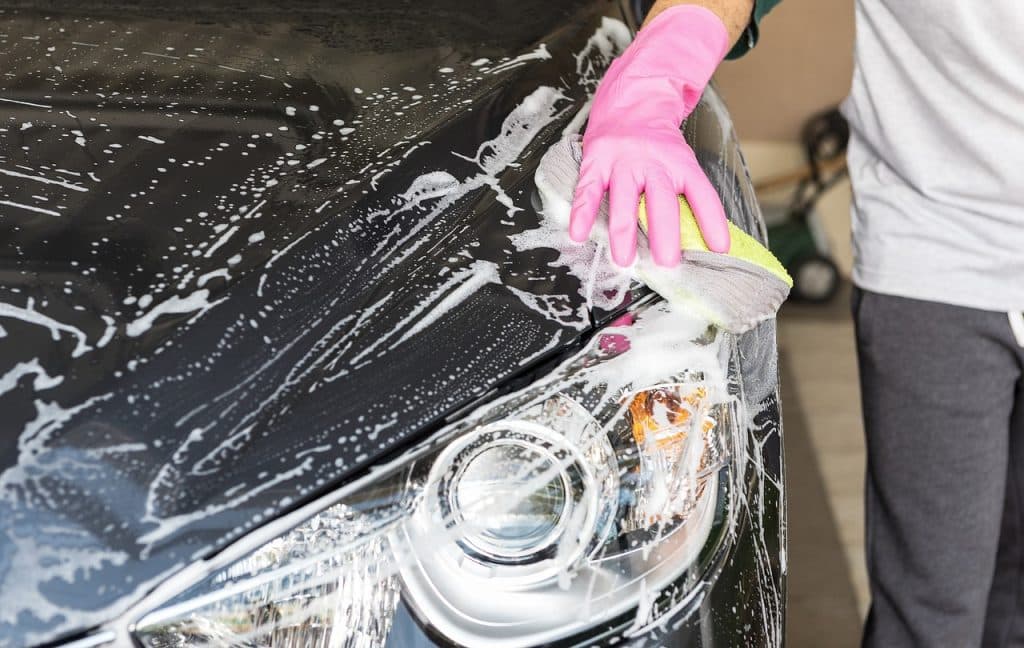
The third step in cleaning hazy headlights with WD-40 is preparing them. This involves prepping the headlights so that they’re ready for cleaning and polishing. To begin, you’ll want to start by washing the headlight lens with warm, soapy water. Doing this removes any dirt and debris stuck to the surface, making it easier for the WD-40 to do its job. Once you’ve done that, rinse off the soap and dry off the headlight lens with a microfiber cloth.
Next, you’ll need to tape off the surrounding areas of your car’s headlight lens using painter’s tape or masking tape. This will help to protect other areas of your car from getting splattered with WD-40 while you’re cleaning. Make sure that you cover up any gaps in order to get full coverage protection around your car’s headlight lens.
After taping up your car’s headlight lens, it’s time to apply the WD-40 directly onto it. Use an aerosol can of WD-40 and spray a generous amount onto the lens. Be sure not to overdo it; too much WD-40 can cause damage instead of helping clean your headlights. Once spraying, let it sit on the lenses for about 15 minutes before wiping away excess residue with a microfiber cloth or paper towel.
At this point, your headlights should be prepped and ready for cleaning and polishing!
4. Applying The Wd-40
Applying the WD-40 is relatively straightforward, but it’s important to do it right. First, you must ensure that the headlights are very clean before applying the lubricant. This means wiping them with a rag, window cleaner, or soap and water. Once they’re dry, you can spray a liberal amount of WD-40 onto the plastic surface of your headlights and let it sit for at least five minutes.
As you wait, you should use this time to prep any other materials you may need in order to complete the job. You should have some clean cloths or rags on hand for buffing out the WD-40 when it’s done soaking in, as well as some window cleaner or soap and water for cleaning up any residue left behind from the lubricant. It’s also a good idea to have some safety glasses handy in case any sprays get into your eyes. ( that would be VERY bad)
Once five minutes have passed, take a clean cloth and buff out any excess WD-40 from the headlights. Make sure all the lubricant is gone before moving on to the next step. When you’re finished buffing out the WD-40, wipe down your headlights with window cleaner or soapy water to ensure they’re completely free of dirt and grime before moving on with your project.
5. Wiping Off The Excess
Applying the WD40 is just the first step in cleaning hazy headlights with this product. Wiping off any excess is another important step that should not be skipped. To do this, start by taking a clean, soft cloth and gently wiping away any leftover residue from the headlight. Make sure to use a gentle touch to ensure you don’t damage the surface of the headlight or scratch it.
It’s also important to take your time when wiping off the excess WD40. This will help ensure that all the dirt and grime loosened up during the application process is completely removed from the headlight. As you wipe, be sure to check for any areas that may need further attention. If there are any stubborn spots, take some extra time to get them out before moving on to the next step in the process.
When you’re done wiping down the headlight, look at your work and ensure it’s been thoroughly cleaned and that no streaks or patches remain on its surface. If everything looks good, you can apply a sealant or wax product designed specifically for headlights to protect them and keep them looking their best over time. Taking these steps now will save you time in the long run by ensuring your headlights stay clean and clear for years to come.
6. Polishing The Headlights
Now that the excess WD-40 has been removed, it’s time to polish the headlights. Start by getting a clean, dry microfiber cloth and some polishing compound. Put a small amount of polishing compound onto the cloth and rub it into the headlight in circular motions. Don’t use too much pressure or you could scratch the surface of your headlights. Keep going until you can see a nice shine on your headlights’ surface.
Once you’re finished with one side, move on to the other and repeat these steps. Make sure not to skip any spots or your headlights won’t look as good as they should when they’re finished. When both sides are polished, take a step back and admire how great your headlights look!
You may need to repeat this process once more if your headlights don’t yet have the perfect shine you were hoping for. Put a bit more polishing compound onto the microfiber cloth and keep rubbing away until you get your desired results. With just a little effort, you can have sparkling clean, and shiny headlights for years to come!
7. Cleaning Hard-To-Reach Areas
When it comes to cleaning hard-to-reach areas of your headlights, there are a few things you should keep in mind. To start, make sure you have the right kind of cleaning tools. For example, a small brush or toothbrush can help get into tight corners and crevices. You’ll also want to use a soft cloth or microfiber towel to buff out any residue after using WD40.
Next, it’s important to use a light touch when cleaning these areas. Too much pressure can damage the plastic of the headlight housing. Instead, dip your cleaning tool into a small amount of WD40 and gently scrub away any dirt or debris that’s accumulated in the area. Remember to wear protective gloves and ensure you’re working in a well-ventilated area when handling WD40 – its fumes can be hazardous if inhaled for too long.
Finally, once all the dirt and grime has been removed from the hard-to-reach areas, give them one final wipe with a clean cloth or towel before polishing your headlights. This will help ensure they look as good as new after you’ve finished your cleaning job!
8. Adding A Sealant
To finish cleaning your headlights with WD-40, it’s important to add a sealant. This will help protect the headlights from future damage and keep them looking good for much longer.
Applying a sealant is simple to do, though you’ll need to make sure you choose the right one for your car. Generally speaking, look for sealants that are specifically designed for automotive use, as these will provide the best protection. When applying the sealant, you’ll want to start at the top of the headlight and then work your way down in overlapping strokes. Make sure you get both sides of each headlight, and let it dry before driving or adding more layers if needed.
Once the sealant has been applied and dried, you can enjoy bright headlights that won’t fog up or get scratched easily. They may also last much longer than before since the sealant now protects them. So don’t forget this step when cleaning your headlights with WD-40 – it can make all the difference in how long they last!
9. Troubleshooting Common Issues
If you’ve followed the steps above and your headlights are still not as clear as you’d like, don’t worry. There are a few other ways to try and get them looking good again. In this section, we’ll look at some common issues people run into when cleaning their headlights with WD-40 and how to troubleshoot them.
The first thing to check is whether there’s dirt or grime on the surface of the headlight that hasn’t been removed. This can be caused by a buildup of road debris over time. To remove this, use a damp cloth and some car shampoo to gently scrub away any dirt or grime before using the WD-40 again. If this is the case you might want to think about using a magic eraser to clean your yellow headlights. They provide more friction and can make it a breeze.
Sometimes, the issue might be caused by oxidized plastic on the headlight itself. If this is the case, you should use a plastic polish designed for car headlights. Rub it onto the affected area in circular motions until it becomes clear again. If this doesn’t work, you may need to purchase a new headlight.
To prevent oxidation from occurring in the future, it’s important to protect your headlights with a sealant after every cleaning session with WD-40. This will help keep your headlights looking shiny and new for longer periods. Additionally, it’s also useful to regularly clean your headlights with soapy water and a soft cloth to keep them free from dirt and grime that can lead to oxidation over time.
10. Regular Maintenance
Regular maintenance of headlights is essential for keeping your car looking good and functioning properly. Doing so will help to prevent the buildup of dirt, dust, and grime that can reduce the strength and visibility of the lights. While there are several methods you can use to clean headlights, one of the simplest is with WD-40.
To get started, gently use a soft cloth or sponge to wipe away any dirt or debris from the headlight. Make sure you’re thorough in cleaning around the edges and crevices. Once that’s done, spray a light coat of WD-40 onto a soft microfiber cloth or paper towel, then carefully rub it onto the headlight in circular motions. Repeat this step until you have completely covered the headlight lens with WD-40.
Once you have finished applying WD-40 to all your headlights, allow them to sit for five minutes before buffing off any excess product with a clean microfiber cloth. This will ensure that all residue is removed and that your headlights are left sparkling clean and clear. With regular maintenance like this, you’ll be able to keep your car looking its best for years to come!
Frequently Asked Questions about wd 40 and your headlights
Is Wd-40 Suitable For All Types Of Headlights?
WD-40 is a petroleum-based product that contains lubricants and corrosion inhibitors. It’s a popular choice for cleaning, lubricating, and protecting against rust and corrosion. While it does have its uses for cleaning headlights — such as removing bugs and tar — it should not be used on plastic or polycarbonate lenses. In these cases, mild soap and water is the best option.
What Is The Best Way To Protect The Headlights After Cleaning?
Once you have your headlights clear again, you want to protect to keep it that way.
You can use a microfiber cloth or paper towel to buff and polish the headlights for a beautiful glossy finish. You should also consider applying a sealant or wax afterward to further protect the headlights from dirt and debris.
Is It Safe To Use Wd-40 On Plastic And Rubber Components?
The main risk is that some WD-40 products contain petroleum distillates which may cause discoloration, cracking, warping, and even melting certain plastics or rubbers. This means that if you use a petroleum-based WD-40 on plastic or rubber components of your headlights, you could end up with permanent damage. It’s therefore important to check the label carefully before using any product on these materials.
Is It Possible To Clean The Headlights Without Using Wd-40?
There is a possibility that there is a negative reaction when using WD 40 on your headlights.
This is because it is not made for this purpose, and if you want to find out the best way to fix your foggy headlights, make sure you check out our full guide.
