
Table of Contents
- Introduction about DIY Car Air Freshener with wax melts
- Materials Needed:
- Step-by-Step Instructions:
- Tips and Tricks:
- Conclusion: A Simple and Affordable Solution for Freshening Your Car’s Air
- FAQs about DIY Car Air Freshener with wax melts
Home » DIY Car Air Freshener with Wax Melts: A Simple Guide
Introduction about DIY Car Air Freshener with wax melts
A car air freshener is a simple yet effective way to keep your vehicle smelling fresh and clean. Whether you want to eliminate unwanted odors or add a pleasant scent to your car, an air freshener can be a useful tool. However, store-bought air fresheners can be expensive and contain potentially harmful chemicals. If you’re looking for a natural and affordable alternative, why not try making your own DIY car air freshener with wax melts?
Wax melts are small, scented wax pieces that you can melt in a warm environment to release their fragrance. They are a popular choice for use in wax warmers and can also be used to make your own car air freshener. You only need a small heat-safe dish or container, and your desired wax melts. You can use a car charger with a USB port to keep the wax melts and the scent strong while driving.
Not only are wax melts a natural and affordable option for a DIY car air freshener, but they also come in various scents to suit your preference. From fresh and clean to warm and cozy, there’s a wax melt scent for everyone. Plus, making your car air freshener with wax melts is a simple project that you can easily customize.
In this guide, we’ll provide a step-by-step guide for making your own DIY car air freshener with wax melts. We’ll also share some tips and tricks for getting the most out of your homemade air freshener. So if you’re ready to ditch the store-bought options and try something natural and affordable, keep reading to learn how to make your own DIY car air freshener with wax melts.
Materials Needed:
Making your own DIY car air freshener with wax melts is a simple and affordable project that requires minimal materials. Here’s a list of everything you’ll need to get started:
Wax melts
The main ingredient in your homemade car air freshener is wax melts. These can be found at most stores selling home fragrance products or purchasing them online. Choose your desired scent – endless options include fresh and clean, warm and cozy, fruity, and more. Keep in mind that you’ll want to choose a scent that is refreshing and not overpowering while driving.
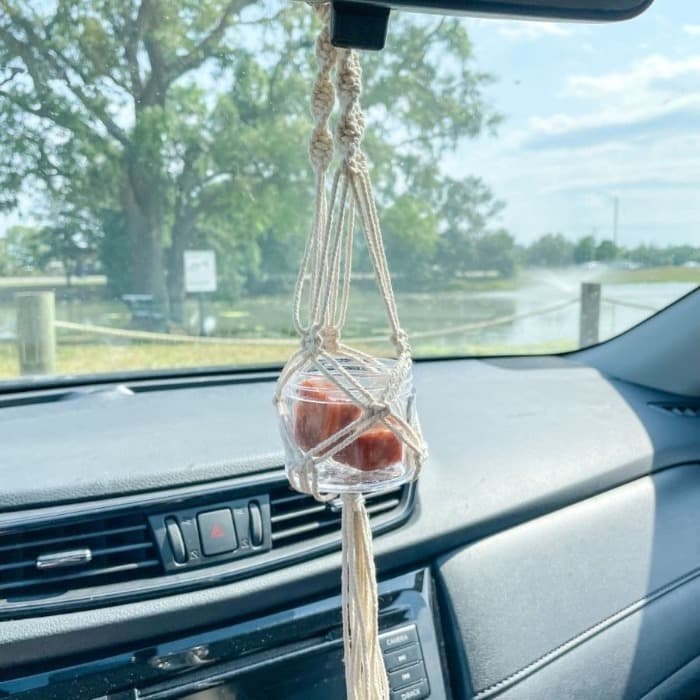
Small heat-safe dish or container
You’ll need a small dish or container to hold the wax melts as they melt and release their scent. Ensure the dish or container is heat-safe, as the wax melts will be melted using heat. A small, shallow dish works well for this project. You can also use a small mason jar or another heat-safe container with a lid. Just be sure to remove the lid while using the car air freshener to allow the scent to be released.
Car charger with USB port (optional)
If you want to keep the wax melts melted and the scent strong while driving, you can use a car charger with a USB port. Simply plug the charger into your car’s cigarette lighter port and place the dish or container on top of the charger to keep the wax melts. This is optional, but it can help to keep the scent strong and long-lasting. If you don’t have a car charger or prefer not to use one, you can simply place the dish or container in the car and allow the wax melts to melt. Remember that the scent may not be as strong without the added heat.
That’s all you’ll need to get started on your DIY car air freshener with wax melts. Once you have your materials gathered, you can move on to the next step of the process – melting the wax melts and releasing their scent in your car.
Step-by-Step Instructions:
Now that you have all of your materials gathered, it’s time to get started on your DIY car air freshener with wax melts. Here’s a step-by-step guide to help you through the process:
Step 1
Choose your desired wax melts and gather all the necessary materials. Before you begin, decide on the scent of wax melts you want to use for your car’s air freshener. Keep in mind that you’ll want to choose a scent that is refreshing and not overpowering while driving. Once you’ve chosen your wax melts, gather all the necessary materials, including the wax melts, a small heat-safe dish or container, and a car charger with a USB port (if using).
Step 2
Place the wax melts in the heat-safe dish or container. Once you have your materials ready, it’s time to start melting the wax melts. Place the wax melts in the heat-safe dish or container. If you’re using a car charger with a USB port, place the dish or container on top of the charger. If you’re not using a car charger, simply place the dish or container in the car.
Step 3
Plug in the car charger with a USB port (if using) and place the dish or container on top. If you’re using a car charger, plug it into the cigarette lighter port in your car and place the dish or container on top. The charger’s heat will help melt the wax melts and release its scent.
Step 4
Allow the wax melts to melt and release their scent, adjusting the heat as needed (if using a car charger). As the wax melts melt, it will release its scent into your car. Using a car charger, you can adjust the heat as needed to keep the wax melts and the scent strong. If you’re not using a car charger, the wax melts will melt on their own, but the scent may not be as strong.
Step 5
Enjoy the natural and refreshing scent in your car! Once the wax melts have melted and released their scent, sit back and enjoy your car’s natural and refreshing aroma. You can add more wax melts to keep the scent strong or switch out the scent as desired.
And that’s it – you’ve now made your own DIY car air freshener with wax melts! This simple and affordable project is a great way to keep your car smelling fresh and clean without breaking the bank or using potentially harmful chemicals. Plus, with the endless variety of wax melt scents to choose from, you can customize your car’s air freshener to your preference.
Tips and Tricks:
Making your own DIY car air freshener with wax melts is a simple and affordable project, but there are a few tips and tricks you can keep in mind to get the most out of your homemade air freshener. Here are a few suggestions to consider:
Use a car charger with a USB port to keep the wax melts melted and the scent strong.
As mentioned earlier, a car charger with a USB port can help to keep the wax melts and the scent strong while driving. This is especially helpful if you’re using a car charger with adjustable heat settings, as you can adjust the heat as needed to keep the wax melts and the scent strong. However, it’s worth noting that using a car charger is unnecessary – you can simply place the dish or container in the car and allow the wax melts to melt.
Choose a scent that will be refreshing and not overpowering while driving.
When selecting the scent for your DIY car air freshener, it’s important to choose a scent that will be refreshing and not overpowering while driving. A strong, overpowering scent can be distracting or even nauseating while driving, so it’s best to stick with a subtle, refreshing scent.
Use caution when placing the dish or container in the car, as it will be hot.
Use caution when placing the dish or container in the car, as it will be hot from the melted wax. Ensure the dish or container is placed in a safe and secure location where it won’t be in the way or cause a distraction while driving. It’s also a good idea to use a dish or container with a handle or grip to make it easier to remove from the car when needed.
Following these tips and tricks ensures that your DIY car air freshener with wax melts is a success. You’ll enjoy your car’s natural and refreshing scent without any unnecessary distractions or hazards.
Conclusion: A Simple and Affordable Solution for Freshening Your Car’s Air
A DIY car air freshener with wax melts is a simple and affordable way to keep your car smelling fresh and clean. Using natural wax melts and a small heat-safe dish or container, you can easily create your own car air freshener without breaking the bank or using potentially harmful chemicals. Plus, with the endless variety of wax melt scents to choose from, you can customize your car’s air freshener to your personal preference.
Not only is a DIY car air freshener with wax melts a natural and affordable option, but it’s also easy to use. Simply place the wax melts in the dish or container, plug in the car charger with a USB port (if using), and allow the wax melts to melt and release their scent. You can adjust the heat as needed (if using a car charger) to keep the wax melts melted and the scent strong.
If you’re looking for a natural and affordable way to keep your car smelling fresh and clean, consider trying out this simple DIY car air freshener with wax melts. Give it a try and see how easy and effective it can be to create your own car air freshener.
FAQs about DIY Car Air Freshener with wax melts
What is wax melts, and how do they work?
Wax melts are small, scented wax pieces that you can melt to release their fragrance. To use wax melts as a car air freshener, you’ll need a small heat-safe dish or container and a car charger with a USB port (optional). Place the wax melts in the dish or container, plug in the car charger (if using), and allow the wax melts to melt and release their scent.
What are the benefits of using a DIY car air freshener with wax melts?
Firstly, wax melts are a affordable option compared to store-bought car air fresheners, which can contain harmful chemicals. Secondly, wax melts come in various scents. Lastly, making your car air freshener with wax melts is a simple.
Can I use any type of wax melt for a DIY car air freshener?
Yes, you can use any type of wax melt for a DIY car air freshener as long as they are safe for use in a warm environment. Just be sure to choose a scent that will be refreshing and not overpowering while driving.
How do I keep the wax melts and the scent strong while driving?
You can use a car charger with a USB port to keep the wax melts and the scent strong while driving. Simply plug the charger into your car’s cigarette lighter port and place the dish or container on top of the charger to keep the wax melting.
How do I clean up the wax when I’m ready to switch out the scent or remove the car air freshener?
To clean up the wax when you’re ready to remove the car air freshener, wait for the wax to cool and solidify. Once solid, you can lift the wax out of the dish.
