Table of Contents
- Introduction to building a DIY cardboard box car
- Materials needed
- Step-by-step instructions
- Tips and tricks
- Conclusion: Building a Fun and Eco-Friendly DIY Cardboard Box Car
- Frequently Asked Questions about DIY Cardboard Car Box
Home » Build Your Own DIY Cardboard Box Car
Introduction to building a DIY cardboard box car
Building a car out of a cardboard box may seem like a childhood pastime, but it can be a fun and rewarding project for people of all ages. Not only is it a cheap and eco-friendly option, but it allows for creativity and customization. Plus, it’s a great way to spend quality time with friends or family.
In this tutorial, we will walk you through the steps of building your own DIY cardboard box car. All you need is a large cardboard box, scissors or a box cutter, glue or tape, and some markers or paint (optional). With these simple materials, you can transform a mundane cardboard box into a unique and functional vehicle.
One of the benefits of using cardboard is that it is a recyclable material. This means that when you are finished with your car, you can break it down and recycle it, reducing waste and helping the environment. The cardboard is also affordable, making it accessible to anyone who wants to try this project.
Whether you’re a parent looking for a fun activity to do with your kids or an adult who wants to tap into your inner child, building a DIY cardboard box car is a great option. It’s easy enough for beginners but also offers the opportunity to get creative and add your own personal touches. So why not give it a try? You might be surprised at what you can create with a simple cardboard box.
Materials needed
Before you get started building your DIY cardboard box car, it’s essential to gather all of the necessary materials. You will need the following:
- A large cardboard box: This will be the base of your car, so it’s crucial to choose a sturdy and appropriately-sized box. You can find cardboard boxes at various retailers or recycle ones you already have at home. Make sure it is large enough to fit a person inside and has straight, even edges for a more stable structure.
- Scissors or a box cutter: These will be used to cut out the bottom of the cardboard box and any other necessary openings, such as windows or doors. If you are using a box cutter, be sure to handle it with caution and keep it out of reach of children.
- Glue or tape: You will need a strong adhesive to secure the edges of the cardboard and reinforce the structure of the car. Glue is generally a more permanent option, while tape can be easily removed or adjusted if needed.
- Markers or paint (optional): If you want to add some personalization to your car, you can use markers or paint to decorate it. This is a fun way to get creative and make your car truly unique. Just be sure to use non-toxic materials if you are building the car with children.
Once you have all of your materials ready, you can begin the process of building your DIY cardboard box car. Follow the step-by-step instructions in the next section to see how it’s done. And don’t forget to have fun and let your creativity shine!
Step-by-step instructions
Now that you have all of your materials ready, it’s time to start building your DIY cardboard box car. Follow these step-by-step instructions to create your very own unique vehicle:
- Cut out the bottom of the cardboard box: The first step in building your car is to cut out the bottom of the box. This will create the base of the car and allow you to sit inside. Use scissors or a box cutter to carefully cut along the bottom edges of the box. You may need to make small slits in the corners to get a clean, straight cut.
- Cut out windows and door openings (optional): If you want to add windows and doors to your car, you can cut out openings on the sides of the box. You can make these openings as big or small as you like. Just be sure to leave enough cardboard around the edges to maintain the structure of the car.
- Secure the edges and reinforce the structure: Once you have cut out the bottom and any desired openings, use glue or tape to secure the edges and reinforce the structure of the car. This will help prevent the cardboard from collapsing or falling apart. You can also add additional materials, such as popsicle sticks or cardboard tubes, for added stability.
- Decorate the car (optional): If you want to add some personalization to your car, you can use markers or paint to decorate it. This is a fun way to make the car your own and add some flair to the design. Just be sure to use non-toxic materials if you are building the car with children.
With these simple steps, you can transform a cardboard box into a fully functional car. Have fun with the process, and share your creation with friends and family.
Tips and tricks
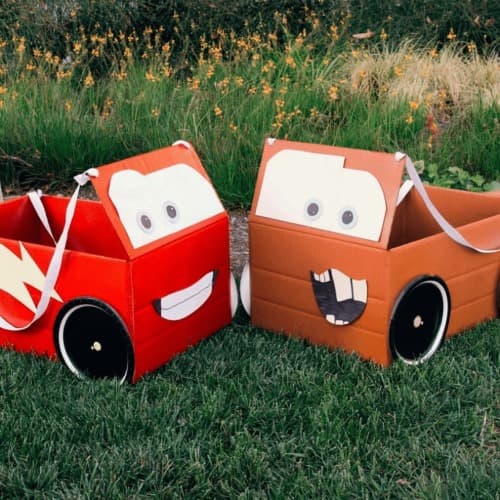
Cardboard box cars for kids’ art project
As you build your DIY cardboard box car, keep these tips and tricks in mind to ensure the best results:
- Use a sturdy cardboard box: It’s important to choose a sturdy and appropriately-sized cardboard box for the base of your car. A flimsy or poorly-shaped box will be more prone to collapsing or falling apart, so select one that is strong and has straight, even edges.
- Consider using additional materials: To add stability to your car, you can use additional materials such as popsicle sticks or cardboard tubes. These can be glued or taped onto the car to reinforce the structure and provide extra support.
- Have fun and be creative: Building a DIY cardboard box car is all about having fun and using your creativity. Feel free to try out new ideas or add personal touches to the design. This is your chance to make the car uniquely yours.
- Share your creation: Once you’ve finished building your car, be sure to share it with friends and family. This is a great opportunity to show off your handiwork and inspire others to try building their own cardboard box car.
With these tips in mind, you’ll be well on your way to creating a unique and functional DIY cardboard box car. Remember to follow the step-by-step instructions in the previous section to see how it’s done. And don’t be afraid to get creative and have fun with the process!
Conclusion: Building a Fun and Eco-Friendly DIY Cardboard Box Car
Congratulations on building your very own DIY cardboard box car! We hope you had fun with the process and were able to use your creativity to create a unique and functional vehicle.
In this tutorial, we walked you through the steps of building a car out of a cardboard box, including gathering materials, cutting out the bottom and openings, securing the edges and reinforcing the structure, and decorating the car (optional). We also offered some tips and tricks to help you get the best results from your project.
Building a car out of a cardboard box is not only a fun and rewarding activity but also an eco-friendly and budget-friendly option. Cardboard is a recyclable material, so when you are finished with your car, you can break it down and recycle it, reducing waste and helping the environment.
We encourage you to try out this project for yourself and share your creations with friends and family. Building a DIY cardboard box car is a great activity for kids and adults alike, and it’s a perfect way to spend quality time together. And you may even inspire others to build their cardboard box car.
Thank you for following along with this tutorial. We hope you enjoyed building your DIY cardboard box car and that it brings you hours of fun and enjoyment.
Frequently Asked Questions about DIY Cardboard Car Box
Is it difficult to build a DIY cardboard box car?
Building a DIY cardboard box car is a relatively simple project that is suitable for people of all ages and skill levels. As long as you have the necessary materials and follow the step-by-step instructions, you can create a functional car successfully.
What materials do I need to build a cardboard box car?
To build a cardboard box car, you will need a large cardboard box, scissors or a box cutter, glue or tape, and markers or paint (optional). These materials can be found at most retailers or may already be in your home.
How long does it take to build a cardboard box car?
The amount of time it takes to build a cardboard box car will depend on the car’s size and the design’s complexity. On average, it should take 1-2 hours to complete the project.
Can I decorate my cardboard box car?
Absolutely! Decorating your cardboard box car is a great way to add personalization and flair to the design. You can use markers or paint to decorate the car and make it your own. Just be sure to use non-toxic materials if you are building the car with children.
Is it safe to ride in a cardboard box car?
While a cardboard box car may not be as sturdy as a traditional vehicle, it can be safe to ride in as long as it is properly built and reinforced. Follow the instructions and use glue or tape to secure the edges and reinforce the structure. It is also good.
