Table of Contents
- Can You Use A Dual Action Polisher To Clean Your Headlights?
- 1. What Is A Dual Action Polisher?
- 2. Benefits Of Using A Dual Action Polisher To Clean Headlights
- 3. Preparing The Headlight For Polishing
- 4. Polishing The Headlight
- 5. Applying A Clear Coat To The Headlight
- 6. Sealing The Headlight
- 7. Maintaining A Polished Headlight
- 8. Cost Considerations Of Owning A Dual Action Polisher
- 9. Safety Tips For Using A Dual Action Polisher
- 10. Alternatives To Using A Dual Action Polisher For Cleaning Headlights
- Conclusion
Home » Using a DA polisher to clean your headlights
Can You Use A Dual Action Polisher To Clean Your Headlights?
Are your headlights looking a bit foggy? Do you want to get them sparkling and shining again? Then you may have heard about using a dual action polisher for the job. But is it possible to use one of these tools to clean your headlights, or will you just end up making things worse?
In this article, we’ll look at what exactly a dual action polisher is, how they work and whether they can be used safely on car headlight lenses to get rid of its hazy look. We’ll also look at other options available so everyone can find the perfect solution for their needs. You won’t have to feel like an outsider when it comes to understanding how to take care of your vehicle’s lights!
We’ll dive into all the details in this piece – so if you’ve been wondering what’s the best way to make sure those headlights are as good as new, stick around and let’s figure out how to make that happen together.
1. What Is A Dual Action Polisher?
If you’re looking for an effective way to clean your car headlights and don’t know where to start, let us introduce you to the dual-action polisher. This handy tool can help make cleaning your headlights a breeze!
But what exactly is a dual-action polisher? Well, it’s basically a machine that combines two different types of motions – rotary motion (like a drill) and orbital motion (shaking back and forth). The combination of these two movements allows the pads on the machine to gently scrub away dirt and grime while also buffing out any scratches or stains on the surface.
Now that we have introduced this helpful tool, let’s look at some of the benefits of using a dual action polisher to clean your car headlights.
2. Benefits Of Using A Dual Action Polisher To Clean Headlights
Polishing your headlamps with a dual-action polisher can be the perfect way to give your car the much-needed sparkle. It is like shining up a diamond, giving it life and vibrance that will make any onlooker do a double take! Here are five reasons why you should consider using a dual action polisher for headlights:
- 1) Speed – The speed of the orbital motion makes cleaning faster compared to manual methods.
- 2) Shine – Get an even shine on your headlight without leaving scratches or damage behind.
- 3) Durability – Using a dual action polisher is more durable than traditional methods and can be used repeatedly over time.
- 4) Versatility – Cleaning both plastic and glass surfaces, this tool can cover all types of materials in one go.
- 5) Safety – Polishing at low speeds eliminates heat buildup which may cause harm to other parts of your vehicle.
With all these benefits combined, no doubt using a dual action polisher for headlights offers many advantages when it comes to getting them clean and shiny quickly and safely. So what are you waiting for? Let’s get those lights looking their best!
3. Preparing The Headlight For Polishing
Preparing the headlight for polishing is like walking a tightrope – it requires finesse and precision. Before commencing a dual action polisher on your headlights, some important steps need to be taken in order to ensure an effective result. Firstly, make sure you have all the necessary supplies: car wash soap, water, microfiber cloths, and of course, the polisher itself. Also, checking if the lights are cool before getting started is essential, as they may become very hot while driving.
Now you’re ready to get down to business! Start by giving your headlights a thorough wash with the soap solution, then rinse them with clean water. Once this is done, use the microfiber cloths to dry off any excess moisture and remove old wax or debris from the surface of the light. Finally, inspect closely for dirt particles or scratches that could prevent proper cleaning when using the polisher – these should be removed beforehand using appropriate methods such as sanding or buffering. Now your headlights are prepped and ready for their shining moment!
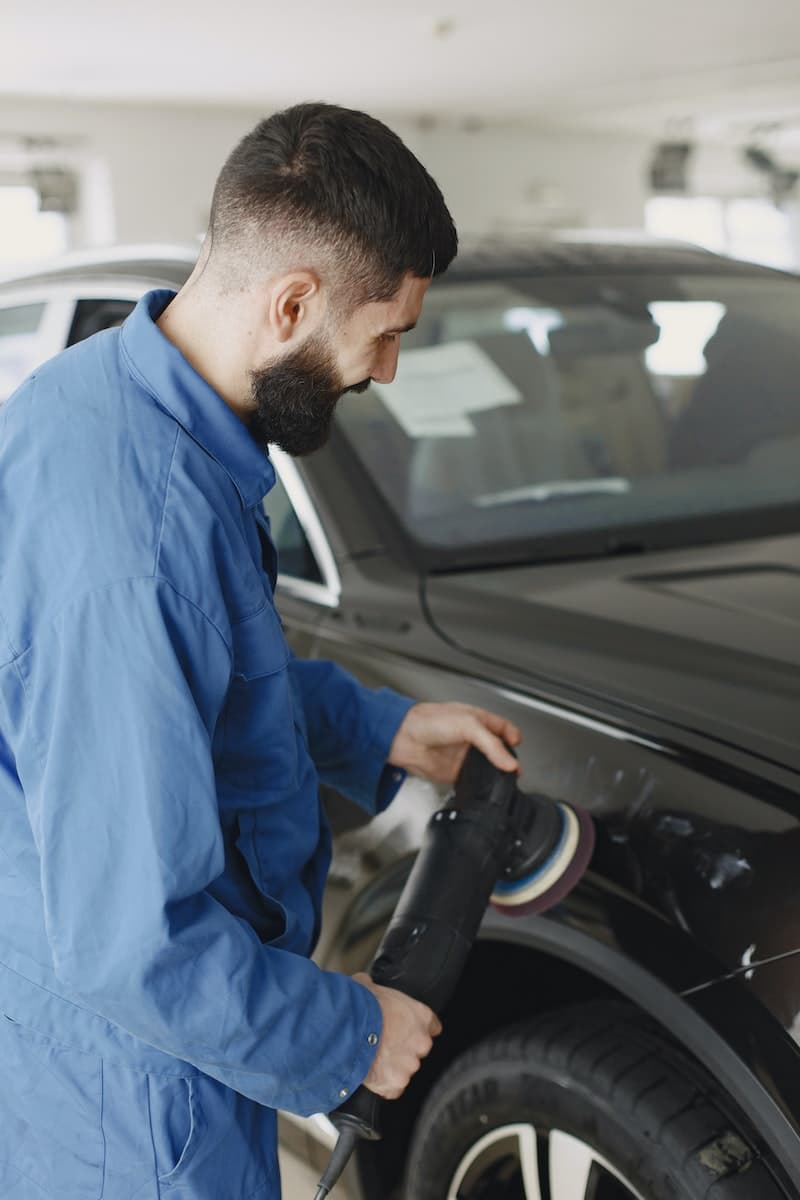
4. Polishing The Headlight
The headlight is like a diamond: it takes time, care and precision. With a dual action polisher in hand, you can begin to restore your headlights back to their original condition. As you pass with the polisher across its surface, keep in mind that each pad stroke must be even and consistent; otherwise, if done incorrectly, there would be an uneven finish on the headlight.
Achieving this perfection requires patience and skill – if done correctly, your headlights will shine brightly for years to come! To ensure optimal results during polishing, apply light pressure when operating the machine and don’t forget to use protective eyewear at all times. After making several passes with the dual action polisher over the headlight’s surface and ensuring no dirt or debris remain, you are ready to move onto applying a clear coat.
5. Applying A Clear Coat To The Headlight
Now that your headlights have been polished, it’s time to protect them. Applying a clear coat helps keep the headlight looking new and prevent oxidation from occurring over time.
Applying a clear coat is simple. Begin by cleaning the surface of any remaining dirt or oils with an alcohol-based solution and lint-free cloth. Once dry, apply several thin layers of clear coat evenly across the entire headlight area – be sure not to saturate one part more than another as this can cause discoloration or bubbling in certain areas once dried. Allow each layer to dry completely before applying the next one until you’ve achieved full coverage.
With your clear coat application complete, you’re ready to seal these newly polished headlights!
6. Sealing The Headlight
Once your headlights are clean and clear, it’s time to seal them. Sealing helps keep the headlight from getting scratched or fogged up in the future. It also prevents oxidation and fading, so your car looks great for years to come! This is why we suggest using a sealant for keeping your headlights clean after you remove the haze from them.
To apply a sealant, you’ll need an applicator such as a soft cloth or foam pad if you’re using a dual action polisher. Just make sure that whatever tool you use is free of lint or other debris that could cause scratches on the headlight surface. Once applied, allow the sealant to dry completely before buffing out any excess with a microfiber towel. Taking these steps will ensure that your hard work pays off and that those shiny new headlights look good long-term. With this foundation laid, you can now maintain a polished headlight finish.
7. Maintaining A Polished Headlight
Keeping your headlights polished is the icing for any car owner. It’s a great way to make sure everything looks its best and helps keep you safe while driving at night. Polishing your headlights with a dual action polisher is an easy way to get consistent results.
Step one is to use the right pads, applying pressure evenly across the headlight surface. The second step is moving the tool in small circles and back-and-forth motions until all the scratches have been removed or reduced. After that, buffing out any remaining imperfections can be done using finer grits – starting with 1500 grit then moving up as needed depending on how deep the defects are. Finally, finish it off by applying a sealant or wax that will protect it from UV damage and further oxidation.
By taking these steps, you’ll end up with perfectly clear headlights that look like they just came from the factory!
8. Cost Considerations Of Owning A Dual Action Polisher
Have you ever wondered how much it would cost to own a dual action polisher? While these tools can provide great results for your car, their price tag may not be the most budget-friendly. Let’s take a look at some of the considerations that come with owning and using this type of polisher.
When investing in a dual-action polisher, there are several factors to consider. The initial purchase price is one factor; however, other ongoing costs should also be considered. Depending on the model chosen, replacement parts such as pads or discs may need to be purchased periodically. In addition, any necessary cleaning supplies or chemicals must also be factored into the total cost. Finally, if repairs become necessary over time then additional expenses could occur.
Considering all of these potential costs up front can help ensure that buying a dual action polisher won’t break the bank. As long as proper maintenance is done regularly, these machines can last for many years, which might pay off in the end!
9. Safety Tips For Using A Dual Action Polisher
Safety is paramount when using a dual action polisher to clean headlights. Although it may seem easy and straightforward, it can be dangerous if you don’t take the necessary precautions. As such, here are some helpful tips on how to stay safe while using one of these machines.
To begin with, make sure that you wear protective gear like gloves and goggles when working with a dual action polisher. Not only will this help protect your eyes from any flying debris or chemical splashes, but it will also ensure that no dust particles get into your lungs. Additionally, always use an extension cord for power and keep all electrical cords away from wet surfaces. Be sure to read the instructions carefully before beginning any work as well.
When cleaning your headlights with a dual action polisher, start slowly at first so that you have time to adjust the speed accordingly. This is especially important since going too fast could cause damage to your vehicle’s paint job or, even worse – potentially injure you! Furthermore, never press down hard on the tool itself; gently guide it to polish the surface area of your headlight covers properly. Taking these precautionary steps should help prevent any mishaps from happening while ensuring that they come out looking as good as new!
10. Alternatives To Using A Dual Action Polisher For Cleaning Headlights
Sometimes, a dual action polisher isn’t the only option for cleaning headlights. Plenty of alternatives exist – and some may be more suitable for your needs! From cost-effective solutions to DIY methods, let’s explore the different ways you can keep your headlights shining bright:
1) Try using toothpaste or baking soda mixed with water. Both are mild abrasives that won’t damage plastic surfaces, so they’re perfect for removing light scratches on lenses.
2) If you don’t have any special tools, try using an old rag and some car wax. This simple method requires minimal effort but still gives good results.
3) Invest in headlight restoration kits – these come with everything you need to make your headlights look like new again without having to buy separate items.
4) Hire a professional detailer who specializes in restoring lights – they’ll know exactly what materials and techniques are best suited for the job at hand.
No matter your choice, it’s important to take safety precautions when working near sensitive areas such as headlamps. Make sure to wear protective gear and follow all manufacturer instructions carefully before attempting any maintenance work on your vehicle. With a little bit of extra care, your headlights should stay clean and clear for years to come!
Conclusion
In conclusion, using a dual action polisher to clean headlights is an effective and efficient way of restoring the clarity of your vehicle’s lighting. It saves time and money compared to other methods and can also help protect the headlight from yellowing due to sun exposure over time. With just a few simple steps, you can have clear and polished headlights that look almost as good as new.
Using a dual action polisher may seem daunting at first, but with proper safety precautions and knowledge of the equipment, anyone can take on this project easily. It will be worth it when you get to admire your sparkling bright lights every day! Just think about how much better your car will look – like a million bucks – all thanks to one helpful tool.
So if your headlights look dull or cloudy, don’t worry – grab yourself a dual action polisher and restore their shine in no time! You’ll never know what kind of difference you can make until you try it out for yourself.
