A car trunk organizer is a great way to keep your gear neat and tidy while on the go. With a simple DIY project, you can easily create your own stylish and functional car trunk organizer. Follow the steps below to get started.
Table of Contents
- Start by measuring the dimensions of your trunk and deciding on a design
- Cut out pieces of fabric or cardboard to use as dividers
- Attach the dividers to the trunk with Velcro, tape, or glue
- Use baskets, bins, or boxes to store smaller items in the trunk organizer
- Label each section so you know where everything is supposed to go
- Conclusion
- FAQs about car trunk organizer
Home » DIY Car Trunk Organizer: Keep Your Gear Neat and Tidy in Style With a Simple DIY Project
Start by measuring the dimensions of your trunk and deciding on a design
DIY car trunk organizers are an easy way to stay organized and maximize the available space in your car’s trunk. Before starting, it is important to measure the dimensions of your trunk so you can pick a design and materials that will work best for you. Most DIY organizers are custom pieces that can be tailored to fit differently shaped trunks of varying sizes. One size does not always fit all, but with a DIY car trunk organizer, you can construct the perfect solution for your needs.
Cut out pieces of fabric or cardboard to use as dividers
Car trunk organizers can be a great help in keeping your vehicle organized and tidy. A simple way to achieve this is to cut out pieces of fabric or cardboard, then arrange them for a customized dividing system. This ensures a more organized setup, by creating specified compartments that can fit items of different shapes and sizes. Furthermore, as the fabric/cardboard construct is made according to personal needs, it will be all the more beneficial to you. Car trunk organizers no longer have to remain thought of as just an idea anymore – get cutting today!
Attach the dividers to the trunk with Velcro, tape, or glue
DIY car trunk organizers are perfect for those who have a variety of odds and ends in their trunks that require organization. Attaching dividers to the trunk with Velcro, tape, or glue is an easy way to ensure that items don’t move around too much when driving. Additionally, these DIY organizers will provide an aesthetically pleasing look while keeping items orderly in the car trunk. Ultimately, DIY organizers create more systematic trunks and are worth the effort.
Use baskets, bins, or boxes to store smaller items in the trunk organizer
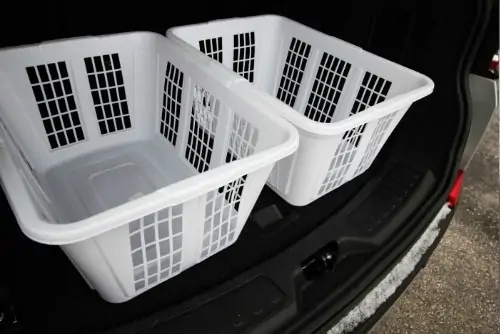
Using baskets, bins, or boxes to store the smaller items in a trunk organizer is an ultimate space saver! This idea makes it much easier to quickly and easily access any items stored in the organizer. Plus, it is an efficient way to ensure that all items stay put — as opposed to just throwing them into the organizer with no form of containment. Not only does this system help maximize storage potential, but it also helps maintain neatness and organization in the vehicle. As a long-term storage solution for small items in the trunk of your car, baskets, bins, and boxes are incredibly cost effective yet highly efficient options.
Label each section so you know where everything is supposed to go
Crafting DIY projects brings both a sense of accomplishment and relief to many DIYers. But organizing a car trunk can be downright overwhelming! To make it easier, labeling each section of the DIY car trunk organizer is crucial. Doing so ensures that you and anyone else who may use the car know exactly where to place items. Labeling also serves as a reminder of where items belong — helping you keep your car trunk organized even if things get jumbled during transit. So take time to label each section and make DIY-ing your DIY car trunk organizer truly rewarding!
Conclusion
Now that you know how to make your own trunk organizer, there’s no excuse for a messy car! This project is simple, cheap, and only takes a few hours to complete. Plus, it will save you time and frustration every time you have to pack up for a road trip or pack the car full of groceries. So what are you waiting for? Get measuring and start creating your very own trunk organizer today.
FAQs about car trunk organizer
What do you need to make a DIY car trunk organizer?
In order to make your own DIY car trunk organizer, you will need some fabric or cardboard, scissors, Velcro, glue, and tape. This is a relatively simple project that can be completed in a few hours with the right supplies.
How do you make a DIY car trunk organizer?
There are a few different ways to make a DIY car trunk organizer, but all of them involve attaching fabric or cardboard dividers to the trunk with some form of adhesive. This can be done with Velcro, tape, or glue, depending on your preference. You can also use baskets, bins, or boxes to store smaller items in the organizer. Finally, it is important to label each section of the organizer so that you and anyone else who may use the car know where everything goes.
What are the benefits of using a car trunk organizer?
Using a car trunk organizer offers many benefits to drivers and passengers alike. Not only does organizing your car trunk make it easier to quickly and easily access any items stored in the space, but it also helps with reducing clutter and creating a more pleasant environment inside the vehicle. With an organized trunk, you can find items faster and never worry about things rolling around when you’re driving. Moreover, having your items carefully organized in separate compartments will prevent them from taking up unnecessary space.
What are some tips for keeping your car trunk organized?
There are a few different ways to keep your car trunk organized, but all of them involve using some type of container to store smaller items. You can use baskets, bins, or boxes to hold items in place and make them easier to access. Additionally, it is important to label each section of the organizer so that you and anyone else who may use the car know where everything goes. Finally, creating a system for how you pack your trunk can help keep things tidy and organized.
How do you clean a car trunk organizer?
If the organizer is made using fabric or cardboard, it can be wiped down with a damp cloth and some mild soap. For more stubborn stains, it may be necessary to use spot-cleaning solutions or sprays that are specifically designed for fabrics. If the organizer is made from plastic or metal, then it can be washed down with warm water and a mild detergent. In either case, it is important to thoroughly dry the organizer before replacing items inside of it.
Related posts:
 DIY Car Tray: Quick and Easy Ways to Create a Food Tray in Your Vehicle
  DIY Rust Proofing Your Car: How to Protect Your Vehicle from Rust and Corrosion DIY Car Organizer Hacks to Help Keep Your Vehicle Neat and Tidy Make Your Own Amazing Cardboard Car: A Guide to Crafting and Assembling Your Own Unique Vehicle from a Box!